This is a write-up about a project involving an LED Matrix, an Arduino, a Raspberry Pi, a bunch of cables and a lot of tinkering. With everything up and running, the rig is able to show simple (but colorful!) messages and animations on the LED display by either using a graphical interface or by using a small web API. Before going any details at all, allow me to start off by showing the finished thing!
Messages can either be added to a queue which loops until the messages are removed, or as a temporary message which show up for a certain amount of time and then disappears.
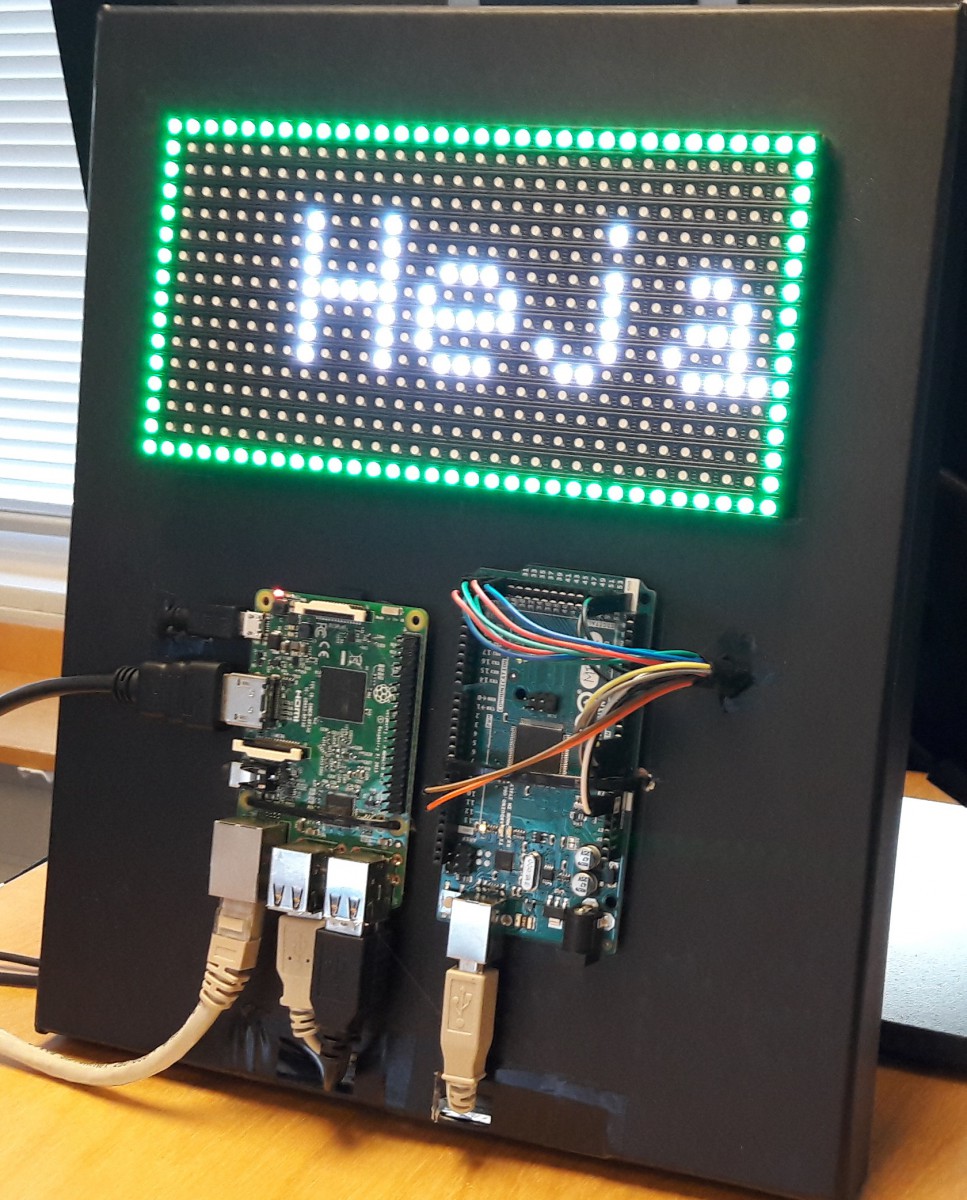
The LED matrix has really bright colors, way brighter than these images show.
From the Inside Out
I’ll briefly go over the steps required to get this up and running. There are a lot of quick hacks and unpolished edges along the way, so please bear that in mind and don’t judge me for any spaghetti code :) If you want to replicate it, you’ll have to figure some things out yourself. I’ll do my best to point you in the right directions!
I’ll will go over things from the inside out, meaning starting out with the core and then adding features along the way. This is the rough order of things:
- Wire up the LED Matrix to the Arduino controller and upload some code
- Build a Node.js server with some serial communication
- Add a small web API that we can use to fetch/add/remove messages to a queue
- Finish with a simple Angular.js web interface for interacting with the server
Want to do it yourself? You’ll need basic programming skills, some familiarity with Linux, a lot of patience, and adequate web search skills. Don’t be afraid to ask me anything in the comments, I’d be happy to clarify parts if needed!
Just want to check out the code? Here you go: https://github.com/victorsand/ledmatrix
The Stuff
This project required some hardware, for obvious reasons. My employer at the time, HiQ Stockholm, was gracious and sponsored me with it. Here’s what I used:
Adafruit 16×32 LED Matrix
https://www.adafruit.com/product/420
The good people over at Adafruit not only sells the display, but they also provide excellent wiring instructions and software. The instructions come with a list of needed accessories such as cabled and power supply.
Arduino Mega
https://www.arduino.cc/en/Main/arduinoBoardMega
This is the microcontroller board that will drive the display. The reason I used a Mega is that the cheaper Uno, for example, does not have enough memory to be able to handle custom messages. More on that later.
Raspberry Pi
https://www.raspberrypi.org/products/raspberry-pi-3-model-b/
Not strictly necessary, as one can use any standard computer. The Pi is obviously very nice in terms of size, price, and wall-mountability. I used a Model 3, but anything with ethernet or WiFi and a USB port should be fine.
Firing Up the Matrix
Wiring
The Adafruit tutorial for wiring the display to the microcontroller is really good, so I simply used that. There should be enough information there to get the LED Matrix and Arduino to run some of the sample programs that are provided with the libraries. If needed, there are tons of basic Arudino tutorials to follow (most of them involved blinking LEDs).
Writing Some Code
I’ll provide the full Arudino code in one fell swoop: https://github.com/victorsand/ledmatrix/blob/master/arduino/scrolling_message/scrolling_message.ino
Here’s how some of the interesting parts work:
The loop() function is the main workhorse. It runs at a very high frequency and starts each iteration off by clearing the screen. Then it used the readSerial() method to see if someone is sending it instructions over serial (USB). The serial instuctions tell the program to either show a background animation or display a message. Then, depending on the display mode, the program either moves and draws the message or updates and draws the animation before starting over.
Messages are saves in a character array buffer, and here’s where the need for the Mega comes in. The Arduino Uno has just enough memory for running the Matrix with double buffering! We want double buffering for smooth animations, but it’s quite demanding. The Mega has plenty of memory for allocating longer strings and running the awesome Matrix animation! If you can live with hard-codes strings it’s possible to store those in PROGMEM, which is larger than the dynamic SRAM memory. However, you can’t change the PROGMEM contents during runtime. One memory-efficient solution is to hard-code a set of strings and use a single serial character to select between those at runtime. Thanks to upgrading to the Mega, there’s a lot of memory (8KB!) to work with. If you’re fine with non-dynamic strings and can do without the animation, save some money and get the Uno.
But wait, doesn’t the Pi have GPIO pins which could be used for driving the LEDs? Sure! But it turns out that the matrix requires very frequent updates to run smoothly. The Pi, being a computer busy with a lot of other things, is not very good at this. A microcontroller like the Arduino on the other hand, is very good at this. Additionally, the provided low-level libraries for the Arduino work great. Communicating with the matrix is not trivial, and when I built this there were no good libraries available for the Raspberry Pi Model 3. Given those things, adding the Arduino was the better choice.
Sending Messages
The Arduino is ready to receive messages, so the next part is a mechanism for sending them. I initially used a standalone Python command line script for this, but it turns out that opening the serial port takes some time and blocks any messages for a second or so. Therefore, I moved this into the Node.js server using the serialport library and a simple module. The module has two core functions – sending instructions for a scrolling message or for the Matrix-inspired animation.
https://github.com/victorsand/ledmatrix/blob/master/pi-server/modules/serialComm.js
Building a message queue API
Next up is a server responsible for two things; keeping track of messages in a queue, and providing an API for communication.
There are two ways to display messages. The first is to display a message once. It is shown for a set amount of time (a minute or so) and then disappears. The other way it to add messages to a queue. The server rotates these messages until they are removed from the queue. If there is nothing to show, the idle animation is shown. The queue was meant as a way to, for example, display information about problems such as broken builds or failing tests. As soon as the problem is fixed, the user (probably a build script somewhere) can remove the message using its unique id.
A disclaimer – the server code is quite messy, as a hack project should be. There is tons of room for improvements to stability, robustness, features and tests. But hey – it works (most of the time)!
Code and API documentation: https://github.com/victorsand/ledmatrix/tree/master/pi-server
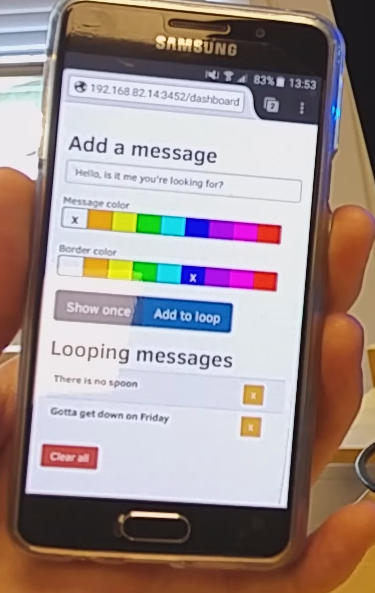
Building a Client
When the server is deployed, anyone with access can GET or POST their way to full control. This project was part of a ”hackathon week” at work, and some colleagues built their own clients for posting information about build status or statistics. However, I thought it would be nice with a simple graphical interface as well (I also wanted to learn some Angular.js):
https://github.com/victorsand/ledmatrix/tree/master/pi-server/static
This client could be run from anywhere (with the right URL dialed in), but the simplest approach was to have the existing server provide it as a static resource. Simple and effective!
Infrastructure and Other Things
I’ve set up a simple bash script to automatically start everything up when the Pi boots. Pretty much everything is hardcoded! :)
https://github.com/victorsand/ledmatrix/tree/master/scripts
There are lots of hardcoded stuff such as paths and ports scattered all over the project, but these should be easy to spot. The project is lacking on the testing side and the message queue does have its quirks!
And finally, if you thought this was cool, please let me know! Thanks!